It’s been a really long time since I’ve wrote a personal post. (Which makes me super sad!) It’s one of my biggest goals this year is to share more about my life. Not only for you guys to get to know us better, but also in an effort to document our lives. I try to share some on Instagram, if you don’t follow me there yet!
I’ve been wanting to make a quilt for a really long time. I actually started one a few years back but didn’t make it far at all and abandoned it shortly after starting.
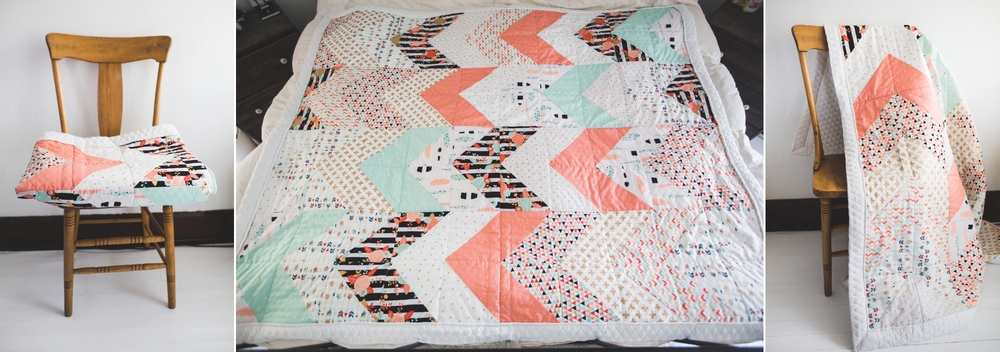
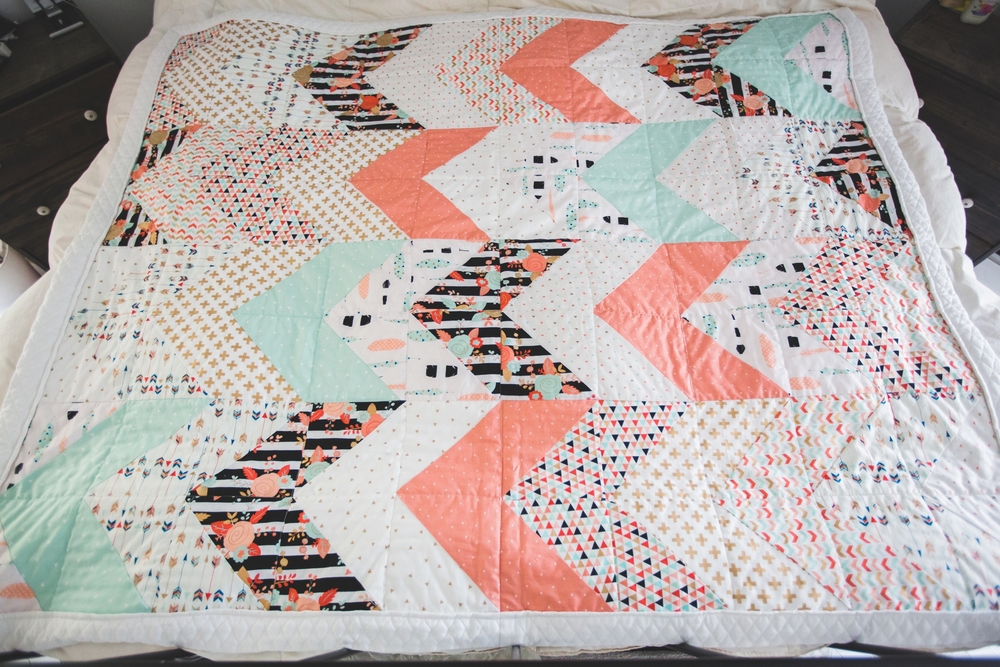
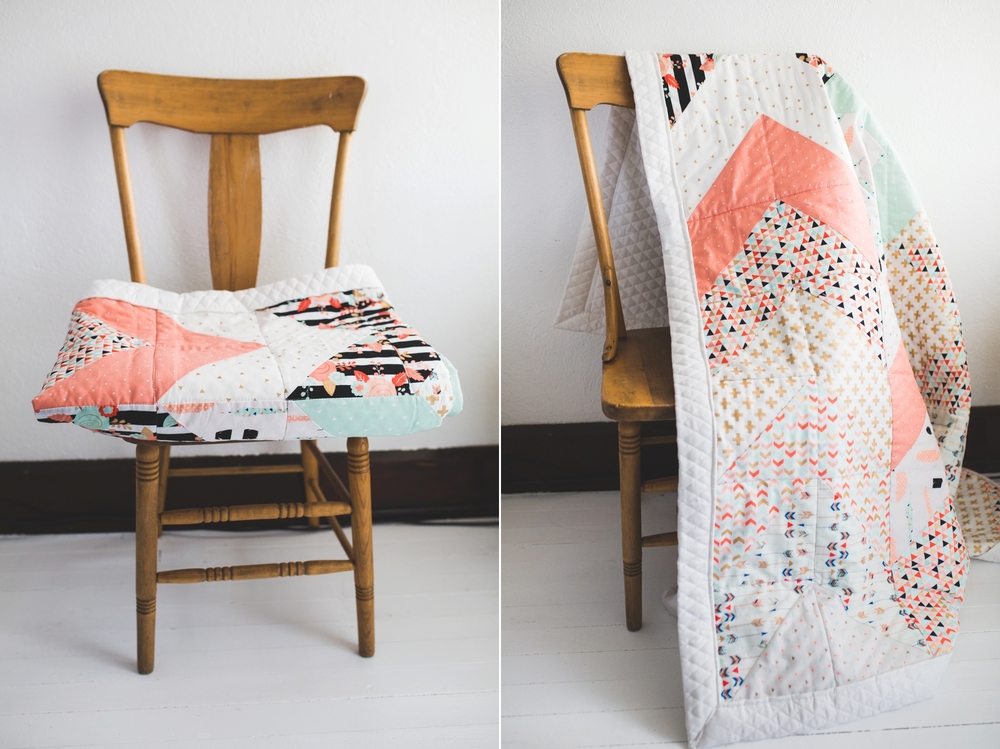
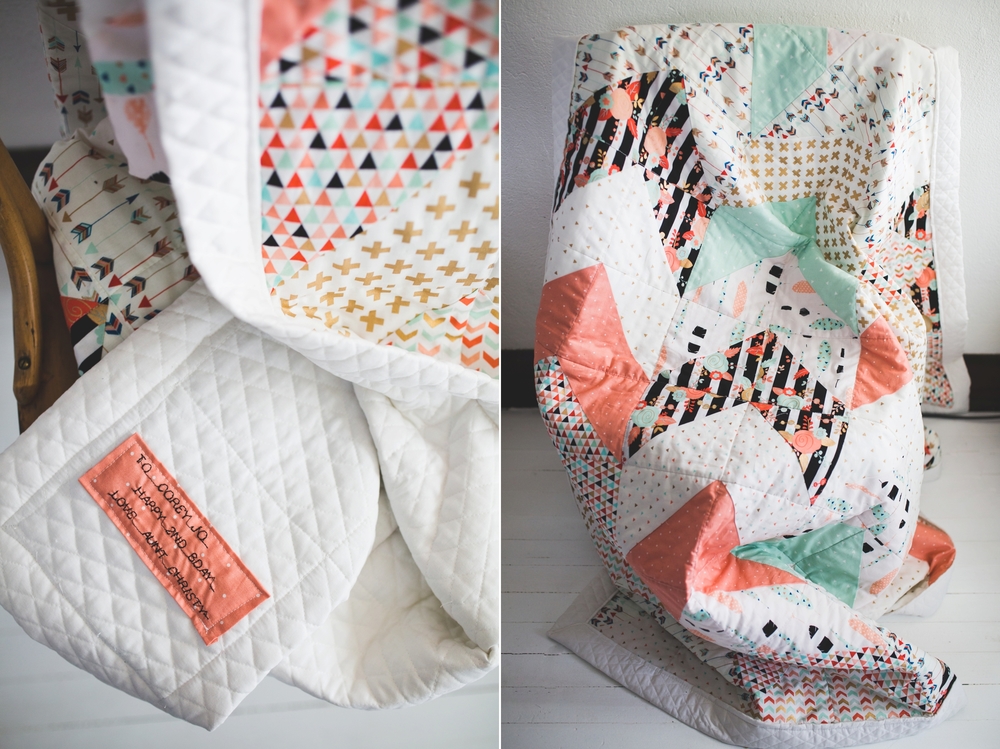
I love crafts and will make a handmade gift any chance I get. My niece recently turned two, and when I saw these fabrics at Hobby Lobby a few months ago and how well they matched her bedroom, I impulsively bought them and decided now is as good a time as ever to attempt a quilt! I just gave it to her yesterday for her birthday. (Hopefully I’ll get a few pics of her with it soon.)
Here are some of the tutorials that really helped me out.
Quilt calculator – this helped me figure out how much fabric I needed for each part. Due to the impulse buy, I ended up with quite a bit more than I needed for the top part so planning it out first would have been helpful.
My first quilt tutorial – covers all the basics. Most comprehensive, easy to follow tutorial I found that covered it all. I’m also the type of person that would much rather read something than watch a video, so these were great.
Binding with a quilt back – everything i read said not to bind with the quilt back if you were doing a quilt larger than crib size. But, I really wanted to use the back, I felt like it would look the best. So, I did it anyway and am surprisingly happy with how it turned out. (I was definitely nervous.) It’s by no means perfect. I mean, none of the quilt is, let’s be real but I’m still really excited about the final product!
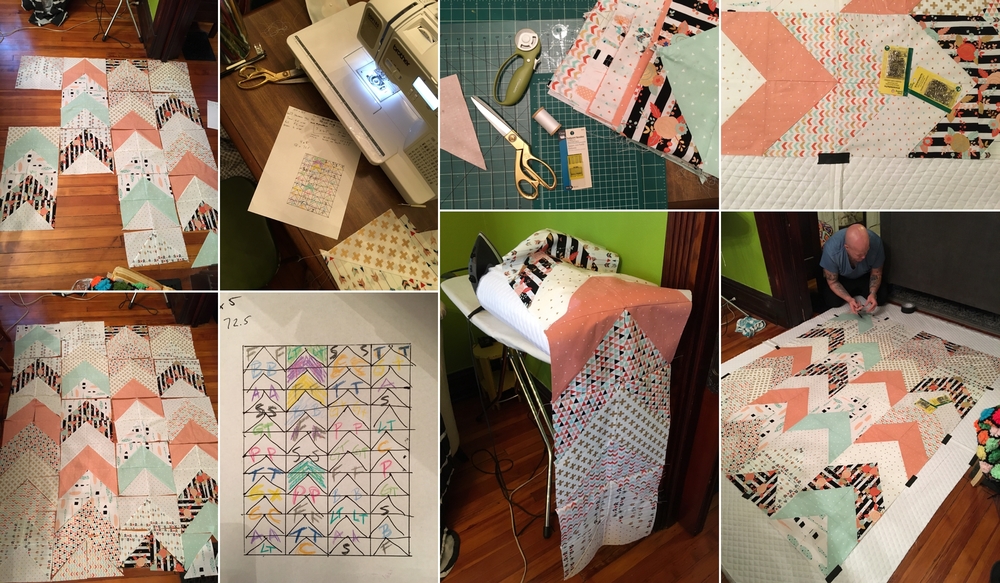
A few ‘in progress’ iPhone pics. (and Josh helping me pin.)
A few things I learned:
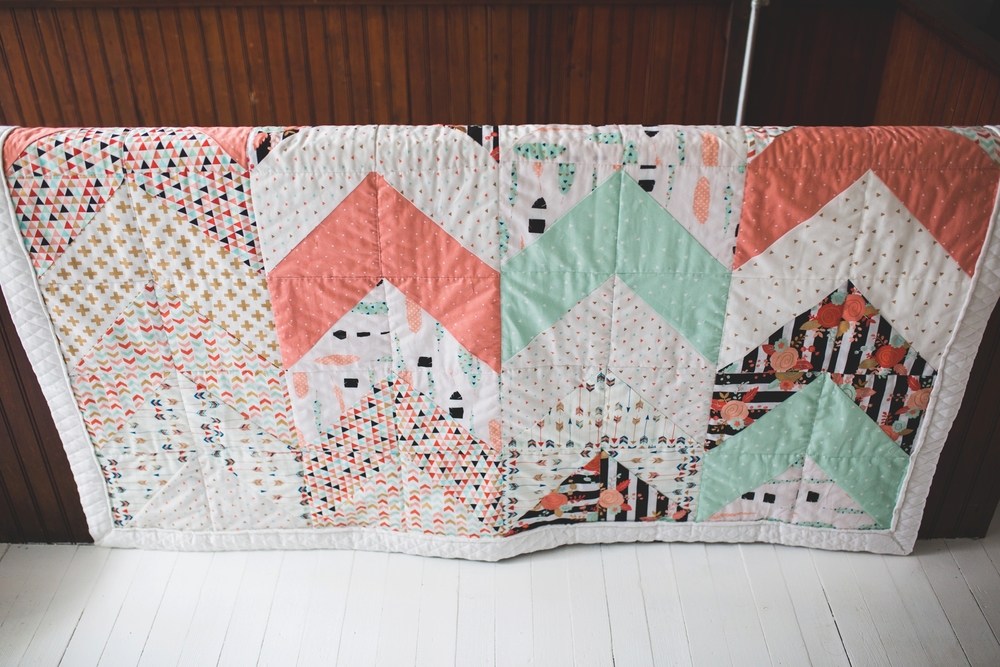
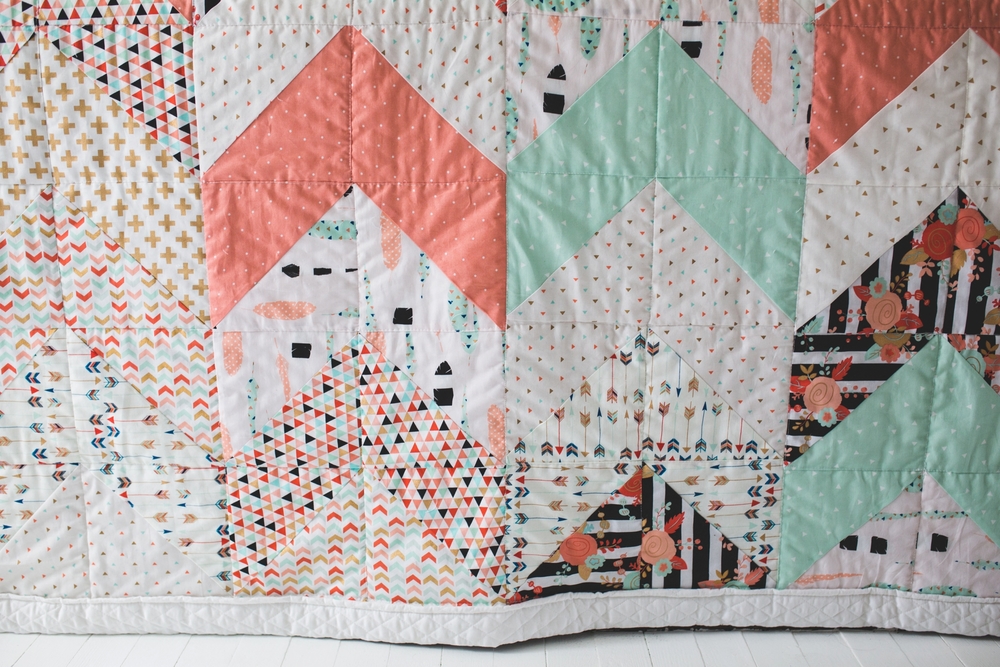
When I purchased the fabric, I knew I wanted to use triangle pieces but didn’t know what pattern. So I just started cutting and then arranged everything on the floor to pick out what I thought looked best. I ended up going with a kind of arrow pattern I guess you could call it. I wouldn’t recommend winging it for your first quilt if you can help it lol. I went into it pretty blind and figuring out a pattern was definitely one of the hardest parts.
Also, due to jumping right in, I had no clue what size I planned to do. I knew I wanted it to be bigger so she could get plenty of use out of it. It ended up being a little smaller than a twin because I didn’t want to oddly cut into the arrow pattern. I could have planned that better.
ABSOLUTELY measure correctly and press your pieces and seams. One tutorial I read, the author said she just used her fingernail to press down her seams. I thought I could possibly skip the actual iron part doing this as well, but quickly learned life is much easier if you just use an iron.
Hopefully this helps anyone out there who has been considering attempting a quilt! I wish I would have kept track of the time it took me to make it, but I feel like it actually took less time than I was expecting. Due to sales and good ole’ 50% off coupons from Jo Ann Fabrics, I think I spent a total of around $40-50 on the materials and still have some left.
A few more pics of the finished product. This is laid out across our kind size bed. I wish I wouldn’t have put it on top of a white (can we still call it white? looks so dingy next to the quilt. haha) comforter so you can see the edges better.

If this inspires you to give quilting a go, I’d love to see your finished product!
